About the author: Waters & Stanton
Waters & Stanton, HF antenna specialist
Waters & Stanton is a leading British amateur radio retailer, founded by Peter Waters (G3OJV) and Jeff Stanton, particularly known for its innovative contributions to HF antennas and practical solutions for radio amateurs faced with space constraints.
With decades of experience in experimenting with and developing antennas, the Waters & Stanton team generously shares its knowledge through technical articles, videos and tutorials for the international amateur radio community.
His pragmatic and accessible approach has helped thousands of radio amateurs overcome the obstacles of garden restrictions, residents' association rules and limited space.
About Ham Radio Store UK
Waters & Stanton now runs Ham Radio Store UK, where the team continues to develop and test new antenna solutions to meet the real needs of radio operators. Its expertise covers every aspect of amateur radio, from digital hotspots to complex antenna installations.
💬 Waters & Stanton explains:
“In this article I want to share with you an antenna I have developed that solves a problem many radio amateurs face: how to get on the HF bands when your garden or property has restrictions, rules or simply little space available. I call it the ‘near-invisible’ HF vertical, a 4-metre vertical that covers five HF bands (20, 17, 15, 12 and 10 metres). It is simple, inexpensive, discreet and surprisingly effective.”
Waters & Stanton's experience with this antenna
Waters & Stanton developed this antenna after receiving many messages from radio amateurs facing the same problem: being unable to put up traditional antennas because of various restrictions. After months of experimenting with different wire lengths, types of mast and radial configurations, the team arrived at this optimum 4-metre solution.
In Waters & Stanton's words: “To be honest, I was pleasantly surprised by the performance of this little vertical. I compared this antenna informally with a 4BTV (a popular multiband vertical) and found the 4-metre near-invisible vertical remarkably close on 20 m, 15 m and 10 m in terms of reports and reception. Exact comparisons are difficult because propagation is constantly changing, but the performance is good enough for enjoyable HF operation.”
His pragmatic approach and rigorous testing have validated this simple but effective design, which is now used by hundreds of radio amateurs around the world in similar situations.
Why a “near-invisible” antenna?
From the messages I receive, it is clear that many people want to operate on HF but cannot put up conventional outdoor antennas. The reasons vary: homeowners' associations, restrictive covenants, tenancy rules, small gardens, or neighbours who object to imposing masts.
Loft antennas are a possible alternative, but lofts are often full of electrical wiring and switch-mode power supplies, which makes noise a major problem. So for many of you, the only practical option is something outdoors that is as discreet as possible.
Design goals: when designing this antenna, my goals were simple: a small physical profile with no visible mast or huge wire across the garden, multiband operation with no traps or complex matching networks, a simple and inexpensive build that is easy to put up, maintain and take down, and reasonable performance compared with a conventional antenna on the same bands.
The basic concept: 4 metres and a single wire
There are two main families of HF antennas: horizontal and vertical (with the inverted V as a halfway house). Horizontal antennas generally need height to work well; they require masts at each end or a tall support that can be quite visible in a garden. Vertical antennas, on the other hand, can be very compact and self-supporting.
“It is a 4-metre length of wire with a 4:1 unun at the base, fed with coax. The whole antenna works on all bands, there are no traps or anything like that.”
What I found by cutting and trying different lengths is that a single straight wire about 4 metres long, mounted on a telescopic or fixed fibreglass mast, radiates effectively on 20, 17, 15, 12 and 10 metres. If you feed this element with a 4:1 unun and lay out a few short radials on the ground, you get a practical multiband antenna that is both inexpensive and discreet.
Main advantages
A 4-metre mast is far less visible than long horizontal wires
A single element covers 5 bands without traps
Attach, set up, lay out the radials and you are ready
Build it for CHF 75-150
Self-supporting structure, no guy ropes
The perfect solution for tight spaces
Comparable to popular verticals such as the 4BTV
Easy to put up and take down for portable use
Materials and approximate costs
Here is what I used for my build and what you can expect to pay (approximate prices, depending on your region and your suppliers):
| Component | Description | Estimated cost |
|---|---|---|
| 7m telescopic mast | Fibreglass, retracts to a practical height (used retracted to about 4 metres) | CHF 25-50 |
| Wire for the vertical element | Any insulated wire suitable for outdoor use, cut to about 4 metres | CHF 6-12 |
| 4:1 unun | LDG or equivalent, for convenience and performance | CHF 40-65 |
| Coaxial cable | RG213 or similar for the run to the shack (the choice affects losses) | Varies with length |
| Short radials | Several 2 m radials tied to a garden cane for easy handling | CHF 6-12 |
| Miscellaneous | Insulating tape, cable ties and weatherproofing materials | CHF 6-12 |
💡 Estimated total cost: you can get on the air for about CHF 75-150. The mast and the unun are the most expensive items. You could even use a tree branch as a mast if you have one and want to camouflage the installation completely.
Construction: step by step
Building this antenna is deliberately simple. I will describe what I did so that you can reproduce it.
- Cut the element: cut a single length of insulated wire to about 4 metres. This is the radiating element. Strip a short length at the base end for connection to the unun.
- Fix the wire to the mast: attach or secure the wire along the fibreglass mast with tape. It does not need to be perfectly straight, but avoid large loops or kinks. If you have a telescopic mast, extend it to the desired height (about 4 metres).
- Fit the 4:1 unun: attach the unun to the base of the mast and connect the element to the unun's wire terminal. Connect the coax feed to the coax socket. Make sure the connectors are secure.
- Lay out the radials: I used several short radials, 2 m long, tied to a garden cane for easy handling. Spread them roughly evenly on the ground around the base.
- Weatherproof: protect the unun from the weather. Wrap all exposed wiring with tape and use cable ties to prevent chafing.

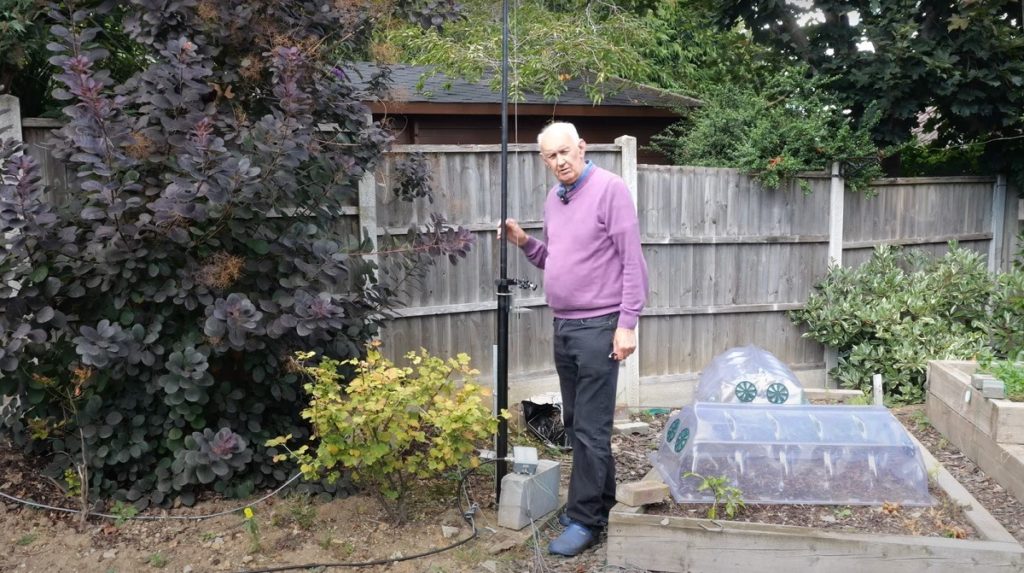
The 4-metre vertical antenna installed with the fibreglass mast and the radials on the ground
💡 Practical tip: the garden cane technique
If you need to mow the lawn, simply lift the radials up on the cane and put them aside while you cut the grass; they are easy to move and lay out again. You can add more radials if you have the space; more radials generally improve matching and efficiency.
Radials: how many and how long?
Radials provide the ground return path for a vertical antenna. In a full-size installation you might lay out many long radials, but for the near-invisible garden version you can use short surface radials.
📐 Radial considerations
- More radials improve efficiency, especially if you are using short surface radials. If possible, add more 2-3 m radials to get a better match.
- Burying the radials is an option (and may look tidier), but you then lose the convenience of being able to check and move them.
- Surface radials are perfect and easy to manage for this discreet installation.
- Elevated radials are an option if you want to optimise further, but they add complexity and visibility.
Matching: 4:1 unun and ATU
One of the clever parts of this design is choosing an element length that presents a roughly medium impedance on the bands of interest. It is not a perfect match (you will not get an SWR of 1:1), but the impedance tends to sit in a middle range rather than very high or very low.
Notes on matching:
- You should expect SWRs generally around 2:1 and up to about 3:1 at the band edges. Not perfect, but manageable.
- Most modern transceivers include internal ATUs. I tested with a Yaesu FT-710 and the FT-1X (Optima), and both matched it without any difficulty.
- If you have an older transceiver without an ATU, you may need an external ATU or a manual tuner.
- Coax losses due to SWR are often overestimated. Even with an SWR of 2:1 or 3:1, the total loss remains modest, well under 1 dB in many practical cases.
Online calculators and real losses
If you are worried about coax losses at high SWR, use an online coax loss calculator. Enter your coax type, length, frequency and SWR and you will see the total loss figures.
📊 My test results: in a realistic example using RG213 on HF with an SWR of 3:1, the losses came out well under 1 dB across much of the bands in question, negligible compared with the uncertainties of propagation and the other losses in the system.
Performance on the bands
How does this little vertical actually perform? To be honest, I was pleasantly surprised.
📻 20-metre band
The 4-metre element is almost a quarter wave, so it performs very well for both DX and local contacts. This is the band where the antenna really excels.
📻 17-metre band
It is almost full size and remains very effective. The results on this band are particularly impressive.
📻 15, 12 and 10-metre bands
The element is longer than a quarter wave and performs well, although the lobes of the radiation pattern change with frequency.
📊 Comparison with the 4BTV
I compared this antenna with a 4BTV (a popular multiband vertical) and found the performance remarkably close on 20m, 15m and 10m.
⚠️ Important caveat about 40 metres: this antenna does not cover 40 m. A vertical on 40 m often behaves unfavourably, giving low-angle lobes when high-angle radiation is needed during the day. If you need reliable performance on 40 m, this design will not be the best choice unless further modifications are made.
Getting more power out on transmit
A simple way to get more signal out on transmit when using a small or compromise antenna is simply to run more transmitter power. I know this invites debate: more power can be dangerous if it is not applied with the appropriate precautions, and local regulations must always be respected.
🔋 Observations at high power
For my tests, I wanted to try a higher power. I found a higher-power 4:1 unun (rated at 2 kW). I did not run 2 kW, but I did put a few hundred watts through it (400-500 W):
- Transmit reports improved by about 1-1.5 S-points compared with 100 W
- There was no improvement on receive (power does not affect the signal-to-noise ratio on receive)
- Running high power requires particular attention to safety (RF exposure, connector ratings, coax quality)
⚠️ Safety: if you are going to run high power, use properly rated equipment and take safety precautions seriously. Always comply with local regulations.
Weatherproofing and maintenance
Any outdoor installation needs sensible weatherproofing. LDG ununs are not always waterproof, so either buy a weatherproof enclosure or protect the unun.

The 4:1 impedance unun that matches the antenna to the coax
“If you want something cheap, easy and effective, use something like cling film. You may need to replace it every year or so, but it works extremely well.”
Cling film (plastic food wrap) around the unun and connectors, with tape to seal it, is a cheap and surprisingly effective short-term solution. Replace it every year or whenever it looks tired. For a more permanent solution, use a small waterproof junction box with a suitable cable gland.
Other maintenance tips
- Inspect the coax connectors and the unun every year for corrosion or moisture ingress
- Check the condition of the mast (fibreglass masts are fairly tough but do age) and re-fix the element if the tape deteriorates
- If you use the garden cane trick for the radials, keep the cane and radials tidy
- Make sure all fixings are secure before strong winds

Detailed view of the 4:1 unun with the connections for the radiating element and the coaxial cable
🎥 Waters & Stanton's explanatory video
Watch the construction and testing of this antenna on video
Waters & Stanton explains the construction and demonstrates the antenna's performance
Common questions and troubleshooting
❓ Will my ATU match this antenna?
Most modern transceivers with an internal ATU will handle the 2:1-3:1 SWR range on these bands. I tested with the Yaesu FT-710 and the FT-1X Optima, and both matched it without any problem.
❓ How many radials do I need?
The more radials the better, but for a garden installation several 2 m radials will get you started. If space allows, add more radials to reduce ground losses.
❓ Can I hide it from my neighbours?
Yes. The whole idea of this antenna is low visual impact. A 4-metre mast is less likely to attract attention than a long horizontal wire or a tall multi-element tower.
❓ Can I change the length?
The 4-metre figure is what worked well for the target bands. You can experiment with slightly different lengths, but the impedance behaviour will change.
Safety and best practice
⚡ Essential safety rules
- Observe the RF exposure guidelines when operating, especially if you choose to run high power
- Use properly rated coax and connectors. Under-rated components can overheat at high power
- Make sure the mast is secure and will not blow over in the wind or fall onto the house
- Disconnect the coax during thunderstorms and follow local safety guidelines for lightning protection
Summary: key points to remember
- A single 4-metre vertical wire fixed to a fibreglass mast provides multiband coverage (20-10 m) with a 4:1 unun at the base
- Short surface radials (2 m) laid on the lawn and tied to a garden cane make deployment and upkeep easy
- Expect an SWR in the region of 2:1 to 3:1; most modern radios with an ATU will match this without difficulty
- Performance is surprisingly close to larger verticals on several bands
- This design does not cover 40 m well; consider a different antenna if 40m is essential
- Weatherproof the unun (cling film or junction box) and follow safe practice
Conclusion
If you want an inexpensive, low-visibility way to get on several HF bands, the 4-metre near-invisible vertical is a compelling option. It is not a miracle antenna: it will not outperform a perfectly installed full-size dipole or a large multi-element beam on every band. But for small gardens, temporary installations, or anyone wanting a compact multiband HF solution, it offers excellent value.
It is cheap, discreet and surprisingly effective on 20, 17, 15, 12 and 10 metres.
“If you are looking for a reasonably priced HF antenna, really very cheap, simple, straightforward, you don't need guy wires or anything like that, you don't need lots of elements, it is a single element. Give it a try. I think you will be very surprised and get a lot of enjoyment out of it.”
If you build one, experiment with the number and layout of the radials; even small adjustments can improve matching and performance. And above all, enjoy amateur radio. This simple, near-invisible antenna opens up HF to many radio amateurs who would otherwise struggle with space or regulations, and that is what makes it worth sharing.
Ready to build your antenna?
Join the thousands of radio amateurs who have already discovered this simple and effective way to get on the HF bands despite space constraints!
73 to all and good QSOs!