🔁 The Ciro Mazzoni Baby Loop: the little antenna everyone is talking about
Short of space for a large HF antenna? The Baby Loop from Italian manufacturer Ciro Mazzoni is an automatically tuned magnetic loop antenna barely 1 metre in diameter, covering 40 m to 10 m continuously. Balcony, small garden, loft or portable outing: it makes HF operating possible where nothing else fits. But it also has its demands. Here is the complete guide: what is good, what is less so, and how to install and tune it properly.
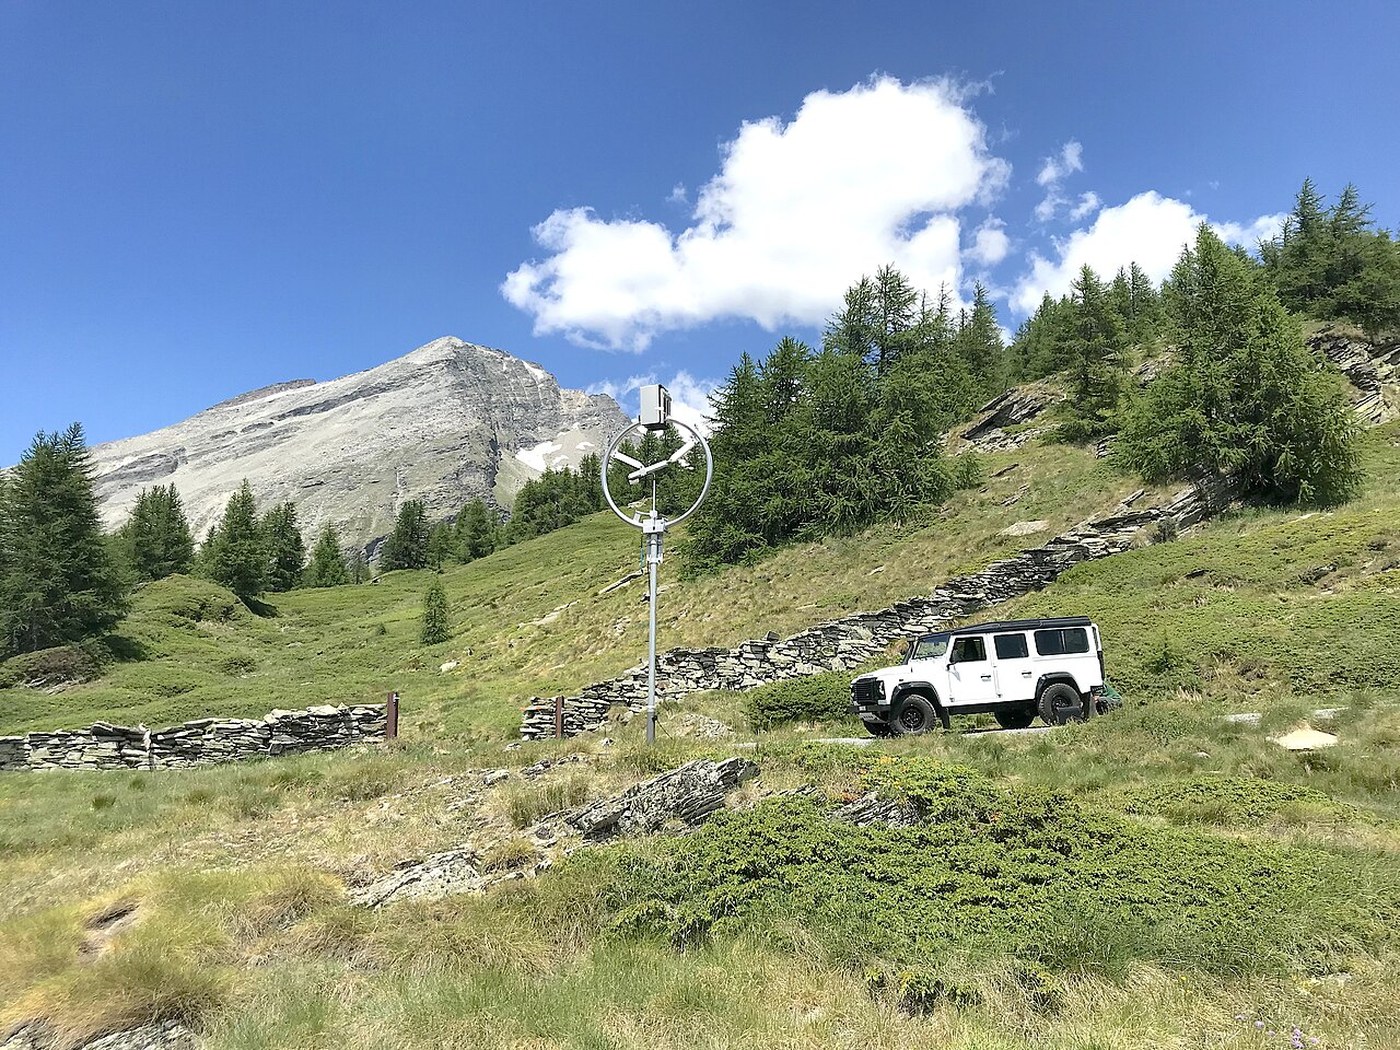
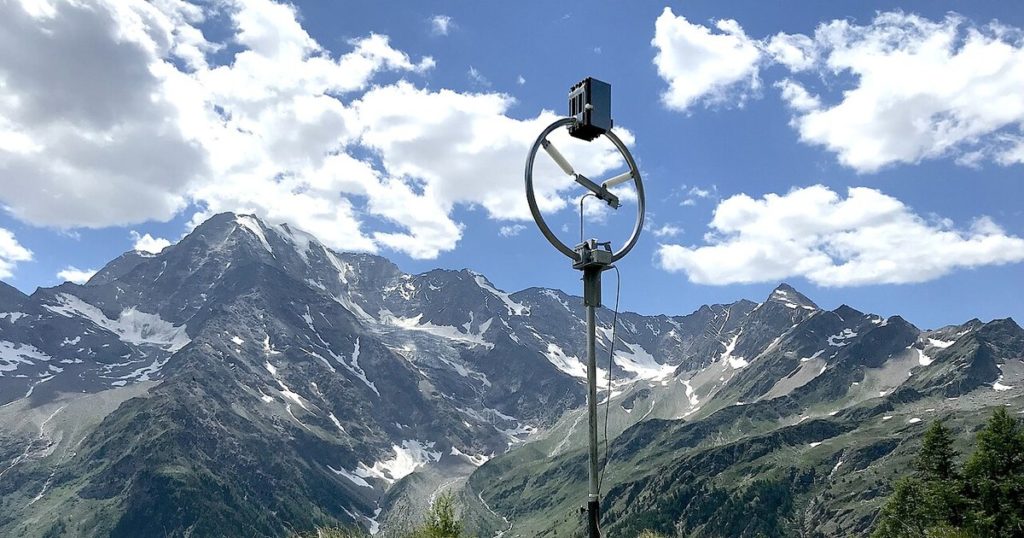
The Baby Loop in action: a simple aluminium tube loop and its motorised capacitor, here deployed for portable use. (Photo: Hp.Baumeler, Wikimedia Commons, CC BY-SA 4.0)
🧲 How does a magnetic loop antenna work?
A magnetic loop antenna (or small transmitting loop) is a conducting loop much smaller than a wavelength, closed by a variable capacitor that makes it resonate. Unlike a dipole, which mainly uses the electric field, the loop works primarily on the magnetic field, which makes it less sensitive to nearby electrical noise and allows it to be placed low, close to the ground.
The price to pay is a very high quality factor (Q): the loop is extremely selective. Excellent news for filtering out noise, but it means you have to retune the capacitor every time you change frequency. This is where Ciro Mazzoni's motorised system really comes into its own.
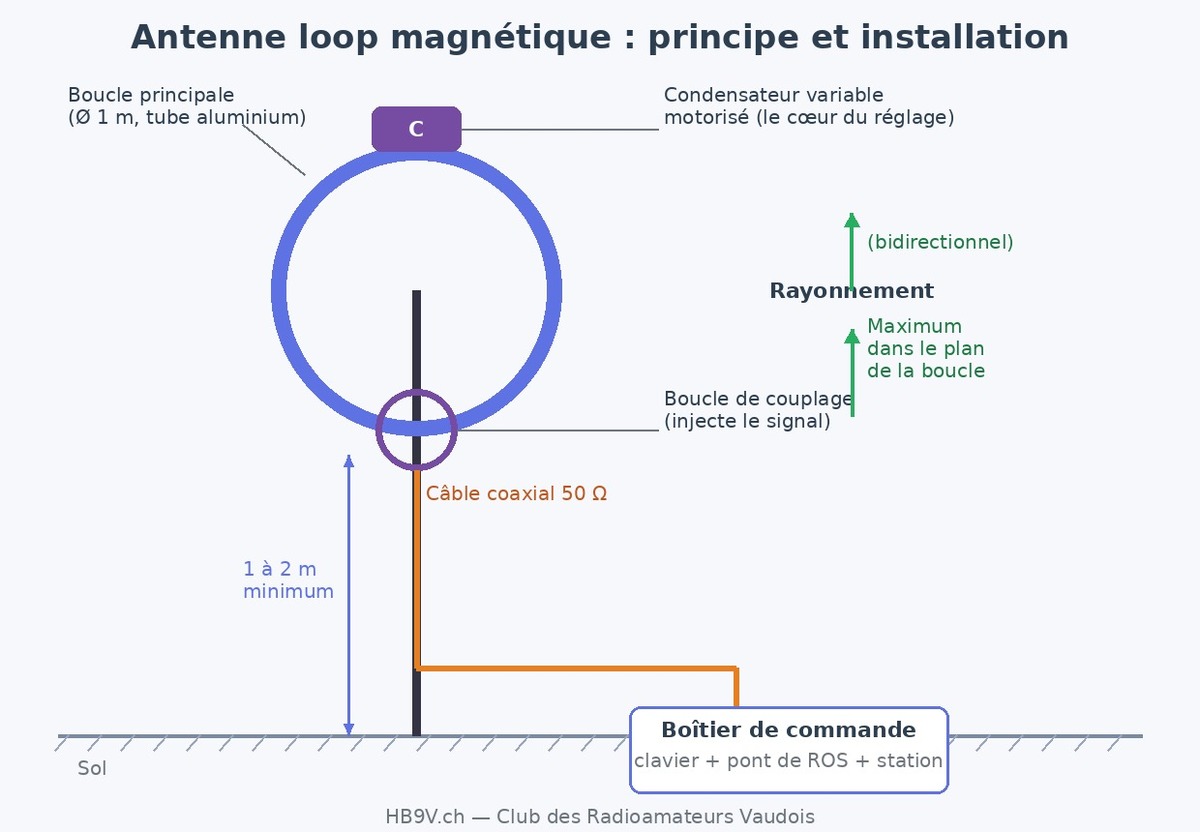
The principle: a large radiating loop, a variable capacitor at the top for tuning, and a small coupling loop at the bottom to feed in the signal via the coax. (Diagram: HB9V)
📋 The Baby Loop in figures
| Feature | Ciro Mazzoni Baby Loop |
|---|---|
| Type | HF magnetic loop with motorised automatic tuning |
| Frequency range | 6.9 to 29.7 MHz continuously, with no gaps |
| Bands covered | 40, 30, 20, 17, 15, 12 and 10 m |
| Diameter / weight | 1 m / about 12 kg |
| Construction | TIG-welded aluminium tube (Ø 50 mm, 2 mm wall) |
| Tuning | Motorised variable capacitor + control box (keypad, SWR bridge, built-in signal generator) |
| Power rating | 450 W up to 21 MHz, 1 kW from 22 to 29.7 MHz |
| Achievable SWR | down to 1.3:1 (often 1.1:1) |
| Bandwidth | very narrow: about 4 kHz at 7 MHz, 6 kHz at 14 MHz, 12 kHz at 21 MHz, 20 kHz at 28 MHz |
| Efficiency | from -4 dB at 7 MHz (modest) to -0.3 dB at 28 MHz (almost total) |
| Radiation pattern | directional (gamma match): front-to-back 6 dB, front-to-side 25 dB, can be rotated like a small beam |
💡 Key point: the higher the frequency, the more efficient and broadband the loop becomes. On 40 m it remains modest (the lot of all small loops), but it works where a 40 m dipole would simply be impossible to install.
🎥 Unboxing and first use on video
Before going into detail, this video presents the antenna, its unboxing, assembly and first use:
“Baby Loop HF Antenna, Overview & Setup”. Video: Ham Radio Made Simple (YouTube).
✅ The good: its strengths
📐 Compact
1 m in diameter: it fits on a balcony, in a small garden, in a loft or in a car boot for portable use.
📶 Continuous multiband
From 40 m to 10 m with no traps and no external tuner. You choose your frequency and the antenna tunes to it.
🪜 Effective at low height
It works very well 1 or 2 m above the ground. No need for a tower, a decisive advantage in town.
🔇 Low-noise reception
Its high selectivity and magnetic coupling reduce ambient noise, which is invaluable in an urban environment.
🎯 Useful directivity
Its pronounced side nulls allow you to strongly attenuate an unwanted station or source of interference.
⚙️ Automatic tuning
You enter the frequency on the keypad and the box does the rest in a few seconds. Remarkably easy to use.
🧱 Robust construction
TIG-welded aluminium, carefully engineered mechanics: equipment built to last, both fixed and portable.
🎒 Truly versatile
Home station in a flat, SOTA activation or holidays: the same antenna goes everywhere.
⚠️ The not so good: limitations to be aware of
🔁 Constant retuning
The bandwidth is so narrow that you have to retune every time you change frequency, sometimes by just a few kHz on 40 and 20 m.
📉 Modest efficiency at the bottom end
On 40 m (and 30 m), the efficiency of such a small loop remains limited. That is physics: no small loop escapes it.
🌡️ Thermal drift
Sun and wind make the tuning shift slightly: you sometimes need to touch it up while operating.
🧱 Sensitive to nearby metal
It must be well clear of metal (gutters, other antennas, roof). So it is not really “unobtrusive” and has a visual impact at eye level.
⚡ High voltages
When transmitting, the capacitor carries voltages of several kilovolts: people must be kept at a distance.
💰 High price
Expect around CHF 2,000. Quality and automation come at a price.
⚡ Safety first: when transmitting, the capacitor area is at very high voltage and the near field is intense. Install the loop out of reach of people and animals, and never touch it while transmitting. Respect the safety distances for exposure to radio frequency fields.
🛠️ How to install it properly
The Baby Loop is simple, but its location makes all the difference. Here are the golden rules:
- Keep it clear of metal. This is point no. 1. Keep the loop away from gutters, metal sheeting, wire mesh, towers, cables and other antennas (aim for several metres). A metal-clad roof is a poor location; a balcony or an open garden is much better.
- No need to mount it very high. It already works well 1 or 2 m above the ground. Extra height helps a little, but the difference is small: above all, prioritise clearance.
- Orient the plane of the loop. Radiation is maximum in the plane of the loop (bidirectional) and minimum off the sides. Turn the antenna towards the desired direction, or place a null towards a source of interference. A small rotator is a real plus.
- Choose a mast of the right diameter. The Baby Loop's mounting clamp fits a tube 50 to 60 mm in diameter: plan for something in that range, preferably non-metallic (fibreglass) in the immediate vicinity of the loop, so as not to disturb the radiation.
- Take care with the cabling. 50 Ω coax for the signal and a control cable for the motor. Observe the motor polarity (reversing it causes an error on the control box) and provide a good earth.
- Think about exposure. Place the loop where nobody passes close by while you are transmitting.
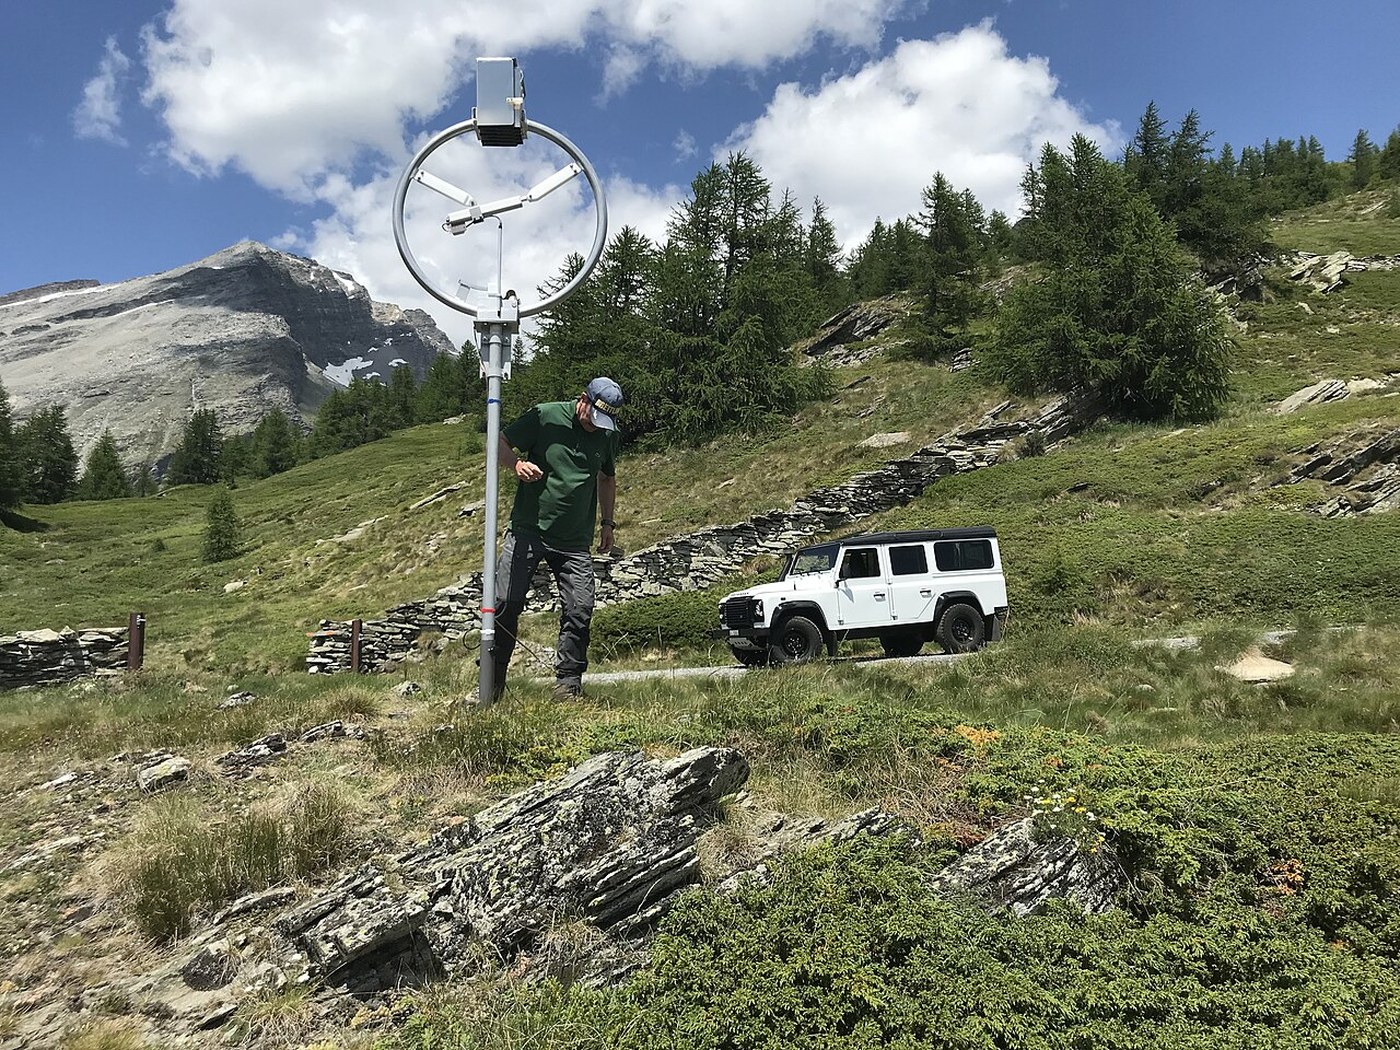
Portable set-up: the Baby Loop can be deployed in a few minutes, well away from any metal. (Photo: Hp.Baumeler, Wikimedia Commons, CC BY-SA 4.0)
⚙️ Configuration and tuning
The control box
Everything is controlled from the control box. It contains a microcontroller, an SWR bridge and a small signal generator. The principle is disarmingly simple: you type in the frequency you want on the keypad, the box drives the motor in small pulses and finds the best SWR on its own, in a few seconds. Recent versions of the controller (32-bit CPU, LCD screen, USB/RS-232) even allow control from a computer and memory management.
Day-to-day tuning
- Retune at every QSY. Even within the same band, as soon as you move a few kHz on 40 or 20 m, start the tuning again. It quickly becomes second nature.
- Tune at low power (the internal generator is enough), then switch to normal transmission once the SWR is achieved.
- Watch out for drift. After a while in the sun or wind, a quick retune puts the SWR right again. Ferrites on the control cable help avoid unwanted retuning.
🔌 About power: the control box passes about 200 W straight through. To run QRO, place the box between the transceiver and the amplifier: tune at low power, then send full power into the loop (450 W up to 21 MHz, 1 kW above).
🧰 “Motor Fail / No Load” error? It appears when the motor reaches its end stop. You fix it by moving the motor away from the end stops using the control box's diagnostic mode, and by checking the polarity of the motor wiring (reversed wiring is the most common cause).
📖 Installation and configuration: details from the manual
To go further, here are the specific points taken from the official I3VHF documentation and the QST product review by Phil Salas (AD5X).
Step-by-step installation
- Clearance: allow at least 2 m (7 feet) of clearance all around the loop. This is essential for good tuning and good performance.
- Height: mount the loop 1.5 to 2.5 m (5 to 8 feet) above the ground. Higher does not really improve performance, but can help to clear obstacles.
- Mast: the clamp fits a tube of 50 to 58 mm (2 to 2.3 inches). A heavy antenna (about 12 kg): two people are recommended for mounting, and allow about 1 hour for assembly.
- Rotator: for a fixed installation, a rotator is strongly recommended because the antenna is directional. DX Engineering recommends a Yaesu G-450ADC with the GC-038 mast adapter.
- Motor control cable: a pair of wires connects the weatherproof box at the base of the antenna to the ATU terminal block. Cross-section depends on length: about 1 mm² (#18 AWG) up to 20 m, 1.5 mm² (#16 AWG) up to 30 m, larger beyond that.
- Coax: an SO-239 socket on the gamma match takes your 50 Ω coaxial cable.
- Portable: an optional tripod is available for outings.
🧭 Note: it is directional! Unlike most small loops, the Baby is fed by a gamma match. It therefore has a front-to-back ratio of about 6 dB and a front-to-side ratio of 25 dB, with maximum radiation towards the gamma match. It behaves a little like a small beam that you rotate, hence the value of a rotator.
The control box (ATU)
- Powered at 24 V DC by a 100-250 V mains adapter, supplied.
- The keypad plugs into the USB port on the front; the CAT interface (DB-9) is on the back.
- The transceiver's RF output passes through the ATU before reaching the coax. Maximum power through the ATU: 200 W. With an amplifier, place it after the ATU (the ATU tunes through the bypassed amplifier).
The tuning procedure
- Press *, type the frequency, confirm with ENTER. Tuning takes a few seconds, without transmitting (the ATU uses a low-power DDS oscillator and an SWR algorithm).
- A red LED indicates that tuning is in progress, a blue LED that the motor is drawing current. At the end, the display shows the frequency and the SWR.
- Speed: a fraction of a second within a band, 2 to 3 seconds from one band to another, about 10 seconds to go from 40 to 10 m.
Control from the transceiver (CAT)
With the optional interface cable, the ATU automatically follows your transceiver (ELAD-DUO, Elecraft, FlexRadio, Icom, Kenwood, Yaesu, depending on the protocol):
- Semi-automatic: the ATU follows the frequency but only tunes when you press ENTER. The most practical option, and recommended for split operation.
- Fully automatic: the ATU retunes continuously as you turn the VFO.
Typical SWR after tuning
| Band (m) | 40 | 30 | 20 | 17 | 15 | 12 | 10 |
|---|---|---|---|---|---|---|---|
| SWR | 1.2 | 1.2 | 1.4 | 1.1 | 1.4 | 1.4 | 1.6 |
🧰 Maintenance and other points: 2-year warranty, and some Mazzoni loops have run for more than 20 years without maintenance. In harsh environments, clean the actuator piston with a soft cloth every few years, then give it a light coat of silicone spray. The firmware is updated via USB stick. If you add an external tuner, it must first be bypassed to let the ATU tune the loop, and then used only to fine-tune the SWR.
🎯 Tips and good practice
📡 Excellent on digital modes
FT8, FT4, WSPR: the loop gives excellent results on digital modes, including at low power (QRP). Intercontinental contacts are possible with a few watts.
🔕 Make use of the nulls
Rotate the loop to place a null on an interfering station or a noise source: the improvement in listening comfort is spectacular.
🏔️ Perfect for portable use
For a SOTA activation or a holiday, it is a multiband HF solution that fits in a car boot and goes up quickly.
🏢 The answer for flats
When the rules forbid large antennas, a loop on a balcony is often the only way to stay active on HF.
🎬 Demonstration in real conditions
To see the automatic tuning and the antenna's behaviour in action:
Demonstration of the Ciro Mazzoni magnetic loop. Video: ML&S Martin Lynch and Sons (YouTube).
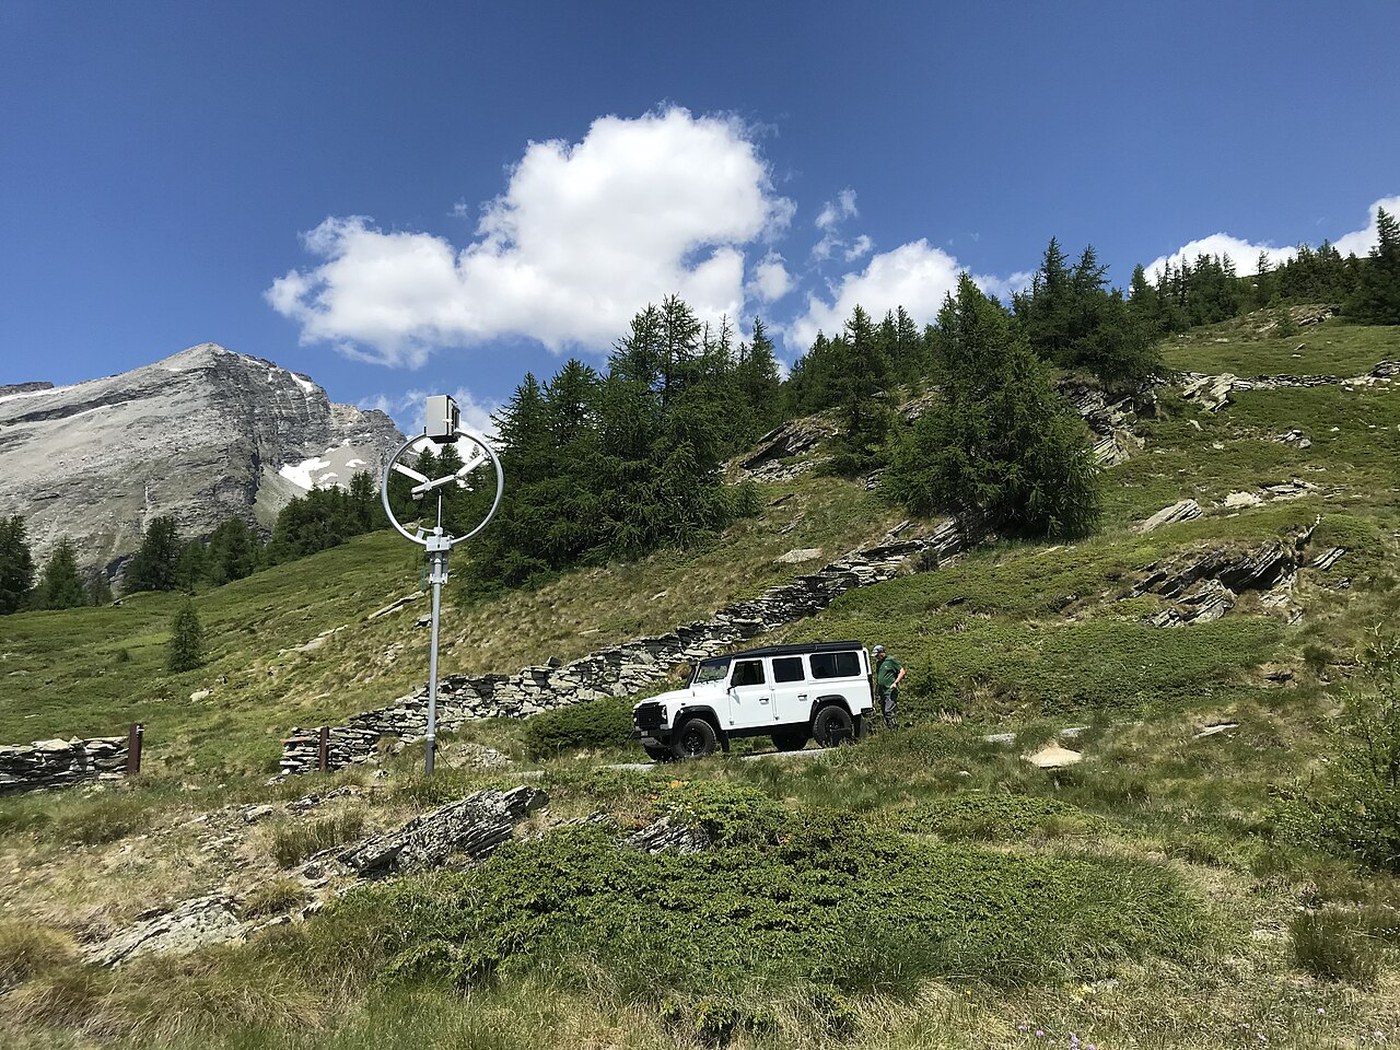
Compact but clearly visible: the Baby Loop needs an open location rather than real camouflage. (Photo: Hp.Baumeler, Wikimedia Commons, CC BY-SA 4.0)
🤔 Who is the Baby Loop for?
It is for you if: you live in a flat or a built-up area, you are short of space or height, you are looking for an unobtrusive but effective, portable, multiband HF antenna, and you value the convenience of automatic tuning. It is also an excellent choice for digital modes and QRP.
Look elsewhere if: your absolute priority is maximum efficiency on 80 and 40 m, you have room for a full-size dipole or vertical, or budget is a deciding factor. A small loop is a compromise: brilliant in its field, but still a compromise.
🇨🇭 A word from HB9V
At HB9V, the Radio Amateurs of Canton Vaud club, we are seeing more and more OMs turn to magnetic loops, for lack of space or because of restrictions in blocks of flats. The Ciro Mazzoni Baby Loop is a safe bet in this category: it lets you stay active on HF from a balcony in Lausanne as well as from a summit in Vaud when operating portable. Our advice: take care over the location (clearance above all), get into the habit of retuning, and have fun with the nulls to tame urban noise. Whether you are an HB3/HB9 licence holder or preparing for your exam, this is an antenna that brings back the smile when space is short.
A fine example close to home: Hans, HB9HIN, uses a Baby Loop in his garden. With this small loop he makes QRP SSB contacts (a few watts) as far as Australia, and as far as the Falkland Islands with 50 W, proof by example that a well-tuned magnetic loop is a genuine DX antenna.
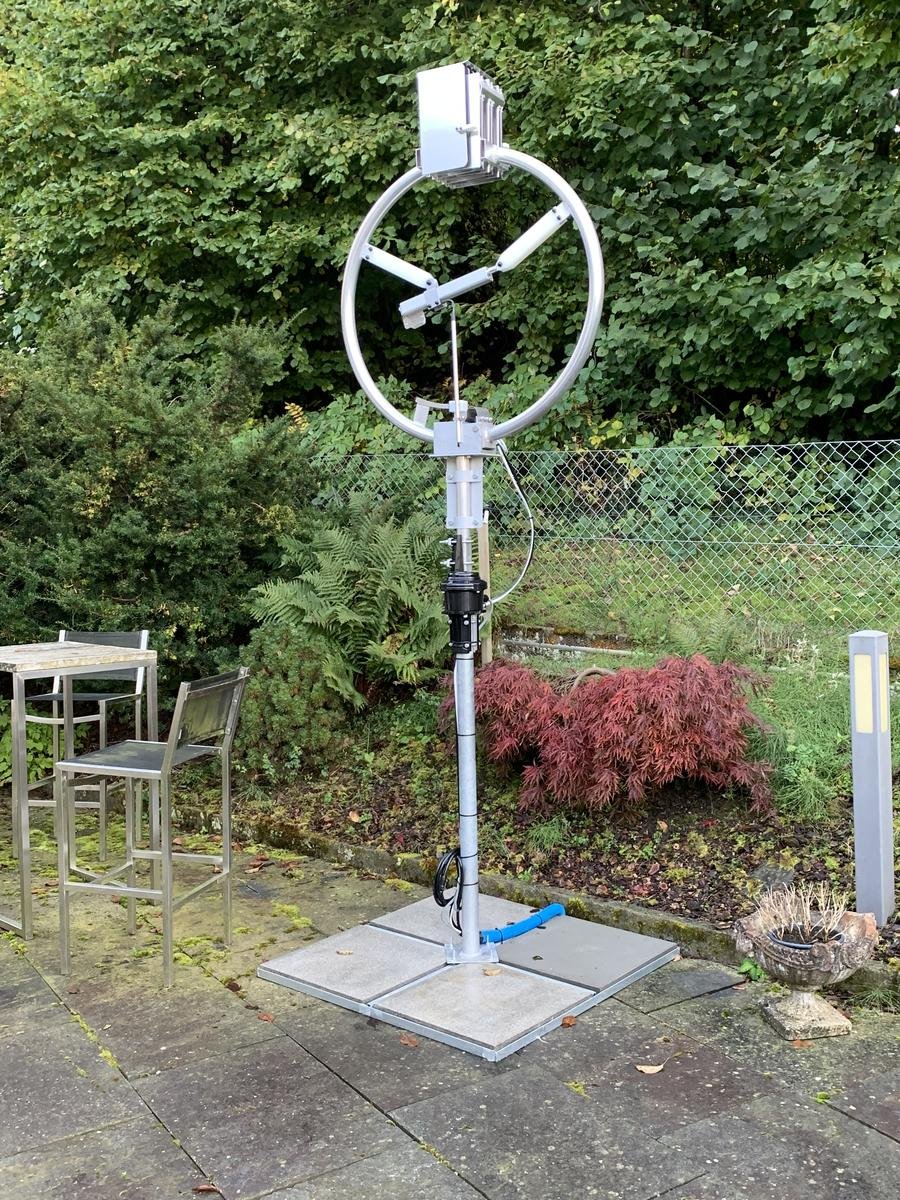
Hans's Baby Loop (HB9HIN) deployed in his garden, well clear of any metal: motorised capacitor at the top, coupling loop inside, all on a simple mast. (Photo: © HB9HIN)
🔁 Fancy trying magnetic loops?
For advice on choosing, installing and the right equipment for your situation, talk to our Swiss partner.
See the antennas at Phonicom →🤝 Our partners

Phonicom.ch, your amateur radio specialist in Switzerland
Magnetic loop, vertical antenna, made-to-measure coax, fibreglass mast or HF transceiver: to set up a station suited to your home, Phonicom will advise and equip you (Yaesu, Icom, Diamond and many more), with after-sales service in Switzerland.
Visit phonicom.ch →📚 Also on HB9V
- 🗺️ Swiss amateur radio band plan: all the HF, VHF and UHF frequencies
- 📊 Radio propagation conditions: the complete guide: get the best out of your antenna
- 📡 Yagi antenna: the complete guide: when space is not a problem
- 📻 The station of Hans HB9HIN: a magnetic loop enthusiast
📖 Sources: documentation from the manufacturer Ciro Mazzoni; detailed review by Scott M. Baker (smbaker.com); Wimo test with 5B4AIY; user reviews on eham.net; official I3VHF manual (loopantennai3vhf.com) and QST product review by Phil Salas AD5X (ARRL, June 2021). Antenna photos: Hp.Baumeler, Wikimedia Commons (CC BY-SA 4.0). Videos: Ham Radio Made Simple and ML&S (YouTube). Diagram: HB9V.